This article is submitted by: Saumitra Kapoor
If you want to publish your articles, you can kindly contact me via email and send your article submissions (content and the resources). Once reviewed, I should accept and post the same 🤗
My name is Saumitra Kapoor and I am in love with Electronics, Circuits, Wires and Devices. I started learning everything about it long back from wherever I could and I haven’t stopped since. I try to read a lot, build fun projects and come up with tutorials.
- My Blog: http://saumitra.co
- LinkedIn: https://www.linkedin.com/in/saumitrakapoor
- Facebook: https://www.facebook.com/saumitra.kapoor.9
- eMail: saumitrakapoor@gmail.com
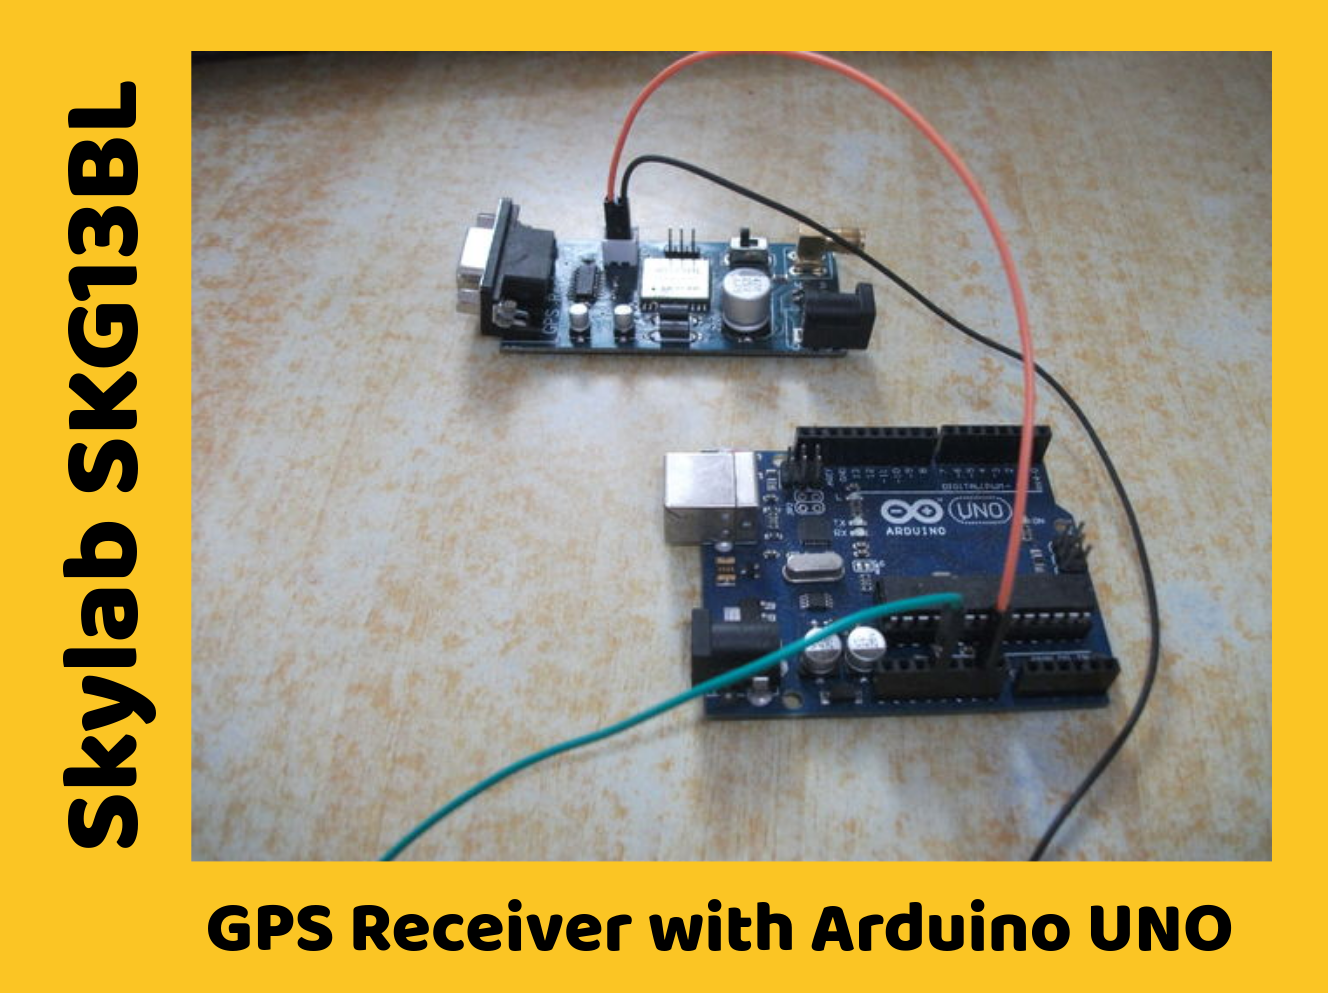
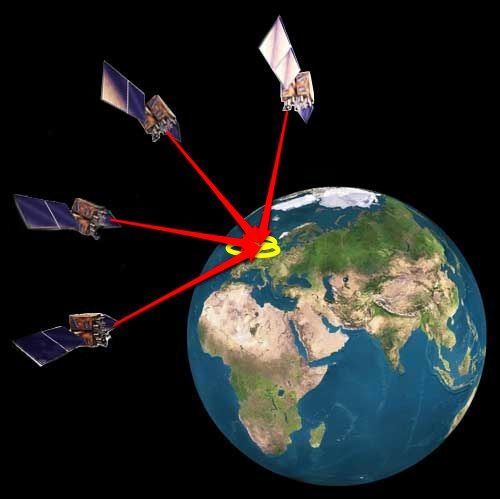
A GPS receiver uses satellites to pinpoint locations, so as long as you have a GPS receiver and a clear view of the sky, you’ll never be lost again. So here is a sample Arduino UNO project where you can interface a GPS Receiver such as Skylab SKG13BL.
Have a look at this amazing site to know more about a GPS Sensor: http://electronics.howstuffworks.com :: How GPS Receivers Work
I would suggest have a look at how the GPS receiver generates a Pseudo Random Code which has a mention in the given site. The GPS system uses an array of satellites orbiting around the earth and sending time information. It picks up the signal transmitted from the satellites, calculates the time it took for the signal to arrive, and by identifying the position of satellites, triangulates the position on the surface of the globe. It uses the standard NMEA protocol (http://www.nmea.org) to transmit the position data via serial port. Let us start exploring the world of GPS!
Here is a list of components needed:
- Arduino UNO
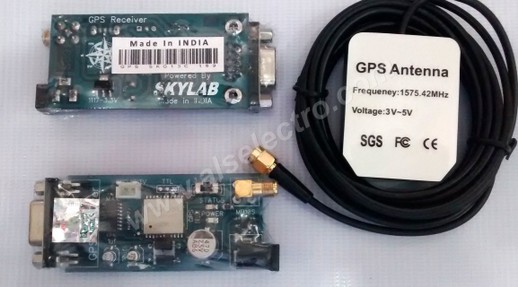
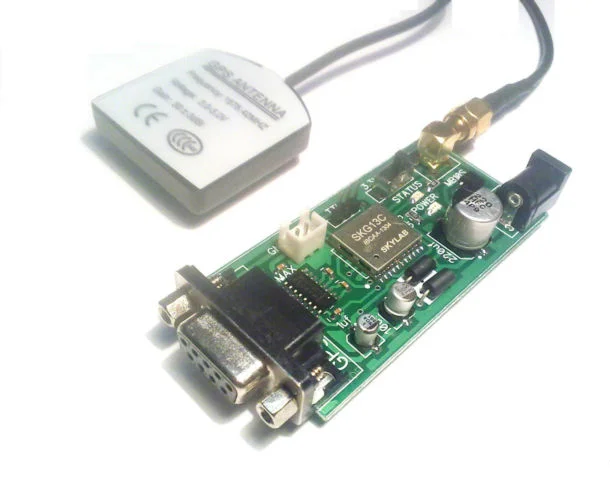
- GPS Receiver – Skylab SKG13BL – Datasheet http://www.zwish.com.cn/production/skg13bl.pdf
- Jumper Wires
- Magnetic Antenna (called Magnetic G Mouse which usually comes with it)
- USB Cable
Here is an image of this module:
The connections are as follows:
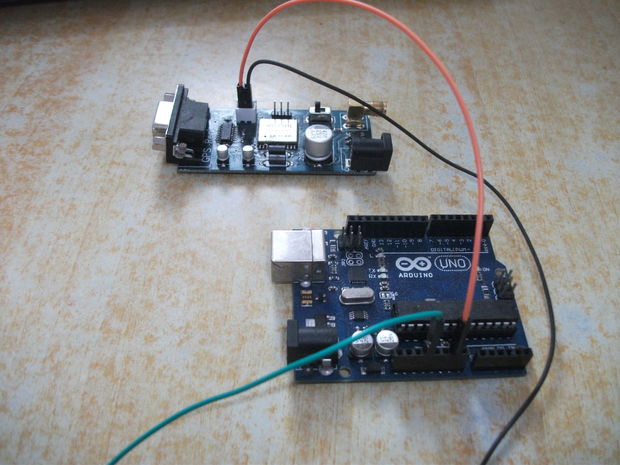
GND of GPS ———— GND of Arduino
3.3V of GPS ————- 3.3V on Arduino
Note: Skylab SKG13BL: It is always a good practice to read the Datasheet. So here you go: http://www.alselectro.com/files/SkyLab_Datasheet.pdf
Note : You can even use a 12V Power source, but here we are using 3.3V.
Most microcontrollers these days have built in UARTs (universally asynchronous receiver/transmitter) that can be used to receive and transmit data serially. UARTs transmit one bit at a time at a specified data rate (i.e. 9600bps, 115200bps, etc.). This method of serial communication is sometimes referred to as TTL serial (transistor-transistor logic).
The last simple connection involves connecting the TLL from GPS to Arduino Board:
Rx of GPS ——– Tx of Arduino (Pin 3)
Tx of GPS ——— Rx of Arduino (Pin 4)
* Refer Pg.8 of the Datasheet.
Now, connect the G Mouse to the GPS Receiver and connect the Arduino board to the PC via USB.
Libraries/Dependencies:
Here are the required libraries we need to install.
Install the TinyGPS Library from here: http://arduiniana.org/libraries/tinygps/
Install the Software Serial Library: https://www.arduino.cc/en/Reference/SoftwareSerial
Please take care of the following:
- Do not connect the GPS Module to Multiple Power Supplies.
- Place the G Mouse at a spot where it can see the sky.
- Please go through the Datasheet.
- You can even use Putty to obtain output (in Windows) – http://www.putty.org/
- If the code shows error, make sure to keep the Baud Rate to 9600.
- If you face port or driver problem,
Do this (in Windows): Control Panel > System and Security > System > Device Manager > Ports > Arduino UNO > Update Driver Software > Browse computer manually and choose the Arduino IDE folder.
Source code:
Download the code HERE.
Kindly remember to refer the previous step in case of Port Error.
Output:
The code will give the Latitude and Longitude. Make sure to divide the output by 10^6 to get correct coordinates.
You can also visit sites likes to map the points:
- http://mygeoposition.com/
- https://mynasadata.larc.nasa.gov/latitudelongitude-finder/
- http://www.gpsvisualizer.com/
So here is the output it generates:
Position: lat: 26865785 lon: 80906375 Position: lat: 26865785 lon: 80906375 Position: lat: 26865785 lon: 80906375 Position: lat: 26865783 lon: 80906375 Position: lat: 26865783 lon: 80906375 Position: lat: 26865783 lon: 80906375 Position: lat: 26865783 lon: 80906375 Position: lat: 26865783 lon: 80906373 Position: lat: 26865783 lon: 80906373 Position: lat: 26865783 lon: 80906373 Position: lat: 26865783 lon: 80906373 Position: lat: 26865783 lon: 80906373 Position: lat: 26865783 lon: 80906373 Position: lat: 26865783 lon: 80906373 Position: lat: 26865783 lon: 80906373 Position: lat: 26865783 lon: 80906372 Position: lat: 26865783 lon: 80906372 Position: lat: 26865783 lon: 80906370 Position: lat: 26865783 lon: 80906370 Position: lat: 26865783 lon: 80906370 Position: lat: 26865783 lon: 80906370 Position: lat: 26865783 lon: 80906372 Position: lat: 26865783 lon: 80906372 Position: lat: 26865783 lon: 80906375